If you’ve ever stared at your home printer and thought, “Okay… can I actually make a whole book with this thing?” you’re in good company.
Being in the publishing industry, we get to talk to people who’ve been around printing and publishing for years. Some manage production schedules. Some know their way around imposition, trim sizes, and binding specs like it’s second nature. And still, this question pops up all the time.
Why? Because sometimes you don’t need a full professional print run. Sometimes you need a fast proof. Or a mockup for a meeting. Or ten copies for a workshop next week. You’ve got a “normal” printer sitting right there, and it’s tempting to just send the job and call it a day.
Here’s the real problem buyers run into: home printing can work, but it’s easy to end up with pages that look slightly off, feel flimsy, or turn into a paper-jam marathon. And if you’re trying to hit a certain level of quality, such as clean margins, consistent duplex alignment, readable text near the spine, decent paper feel, you can waste a lot of time getting there.
This post gives you:
- A clear, no-drama answer on whether you can print a book using a normal printer
- A practical, step-by-step way to do it at home without chaos
- File setup tips (the stuff that prevents “why is this cropped?!” moments)
- Paper choices that make your book feel better in someone’s hands
- A simple way to estimate the cost to print a book at home
- The most common risks of printing a book at home and how to avoid them
- A quick guide to self-publishing printing options when home printing stops making sense
By the end, you’ll know exactly when home printing is a smart move and when it’s just going to annoy you.
Here’s what we’ll be covering in this article:
- Can you print a book using a normal printer?
- How to print a book at home
- DIY book printing guide
- Format a book for printing
- Inkjet vs laser for book printing
- Best paper for book printing
- Cost to print a book at home
- Risks of printing a book at home
- Self-publishing printing options
- FAQs
Can you Print a Book using a Normal Printer?
Yes, definitely. You can print a book using a normal printer.
The better question is: what kind of book, how many copies, and what quality level are you aiming for using your printer?
Home printing makes a lot of sense when:
- You’re printing one to five copies (proofs, gifts, samples)
- The book is short (zines, manuals, workbooks, booklets)
- It’s mostly black text
- You’re okay with a white border (most home printers don’t do true edge-to-edge)
- You can spend time on test prints
Home printing gets rough when:
- You need 50+ copies
- Your book is 200+ pages
- You care a lot about color matching
- You want a bookstore-ready finish (clean trim, professional binding, consistent results)
- You need a cover that looks “real” (not “printed on cardstock at midnight”)
Here’s a useful way to think about it: a normal printer is great at being a printer. It’s not built to be a full bookmaking system. When you ask it to act like one, it can do it… but you’ll feel the limits.
How to Print a Book at Home Step by Step?
If you’re wondering about how to print a book at home, here’s a step by step approach to do it.
Step 1: Decide what your “book” format is
Home books usually fit into one of these:
- Stapled booklet (saddle-stitched)
Great for short page counts. Think programs, zines, small guides.
- Coil/comb binding
Awesome for workbooks, cookbooks, and training manuals. Lays flat. Feels practical.
- Three-ring binder
Not fancy, but sturdy and easy to update. Perfect for internal docs.
- Perfect binding (glued spine)
Looks most like a “real paperback,” but doing it well at home is tricky.
Pick your binding before you print everything. Binding affects margins and how close text can sit near the spine.
Step 2: Choose the paper size your printer likes
In the USA, most home printers are happiest with:
- Letter (8.5″ x 11″)
Some can also do:
- Legal (8.5″ x 14″)
- Tabloid (11” x 17”) (less common at home)
If your target trim size is smaller (like 5.5” x 8.5” or 6” x 9”), you have two main options:
- Print on Letter and trim down (more work, cleaner result)
- Set up the smaller page size and print centered on Letter with margins (easier, but you keep borders)
Step 3: Export a clean PDF
If you’re serious about making the pages behave, print from a PDF. PDFs keep the layout stable.
Quick checks:
- Fonts embedded
- Correct page size
- No “fit to page” surprises
- Images not blurry
Step 4: Print a test set first (always)
Print:
- 1 title page
- 1 page with dense text
- 1 page with an image (if you have images)
- 2–4 pages that will be printed duplex
Then check:
- Are margins consistent?
- Are headers/footers where you expect?
- Does the back side line up decently with the front?
- Any smudging?
This tiny test saves stacks of wasted paper.
Step 5: Print in batches
Even good printers get cranky with long runs.
Try:
- 20–40 sheets at a time
- Let the printer rest between batches
- Keep output stacks neat and labeled
Step 6: Bind after you’ve verified page order
Before binding, do a fast “flip test”:
- Page numbers in order?
- Any upside-down pages?
- Any repeats or missing pages?
- Duplex pages oriented correctly?
Then bind.
If your goal is to print a book using a normal printer and end up with something you’re proud to hand to someone, this is the rhythm.
DIY Book Printing Guide (Setup + Checklist you’ll actually use)
This section is the “preflight checklist for your DIY book printing guide. People who work in publishing already know this vibe: boring checks prevent loud problems.
Your home-print preflight checklist of the DIY book printing guide
File prep
- Export PDF (not a Word doc, you’re “hoping prints the same”)
- Fonts embedded (or converted properly)
- Images at decent resolution (300 dpi for print is a common target, but even 150–200 can be okay for simple prints)
- Page numbers confirmed (front matter can shift numbering)
- Margins set with binding in mind
Printer prep
- Enough ink/toner for the whole job (mixing half-empty cartridges mid-run can cause shifts)
- Clean paper path (dust causes streaks)
- Correct paper type selected in printer settings
- Duplex setting checked (flip on long edge vs short edge)
Process prep
- Plan how you’ll keep pages in order (boxes, trays, labeled piles)
- Plan your binding method and tools first
- Plan trimming if needed (paper trimmer beats scissors every time)
Tiny pro tip from the production world
If you’re printing a long document, add a small “batch marker” on a corner of certain pages (like every 25 pages) during proofing. Even a tiny dot or symbol helps you spot missing chunks.
You can remove it for the final, but during testing, it’s a lifesaver.
Format a Book for Printing (So it Reads Right on Paper)
This is where a lot of home-printed books quietly fall apart. On screen, everything looks fine. In your hand? Suddenly, the inside margins feel tight, and the page numbers look weirdly close to the edge.
Then, how to format a book for printing? Let’s fix that:
1) Set margins with a gutter (the spine needs space)
If you bind on the left, the left margin needs extra breathing room. That inside area is the gutter.
A simple approach:
- Outside margin: normal
- Inside margin (gutter side): a bit bigger
How much bigger depends on binding:
- Stapled booklet: small extra gutter
- Comb/coil: moderate extra gutter
- Perfect binding: bigger gutter (pages don’t open flat)
If you’re making something people will actually read, gutter space matters. Nobody likes cracking a spine just to read a sentence.
2) Use “facing pages” if your layout needs it
For books that read like a normal book (left page + right page), facing pages help:
- Odd pages on the right
- Even pages on the left
- Margins mirrored properly
If you’ve worked in publishing, you already know this. If you haven’t, this is one of those “small change, huge improvement” moves.
3) Watch out for scaling settings (this causes sneaky disasters)
Printer dialogs love defaulting to stuff like:
- “Fit to page”
- “Shrink oversized pages”
- “Borderless scaling”
That’s how you end up with:
- Slightly cropped text
- Margins shifting page to page
- Page numbers drifting
If you want consistent results, print at:
- Actual size (or 100%)
4) Bleed: Most home printers don’t do it cleanly
Bleed means the color goes to the edge. Most normal printers can’t print edge-to-edge without hacks.
So you either:
- Accept a white border (clean and simple), or
- Print larger and trim (cleaner look, more work)
If you’re doing a quick proof, go with the border. If you’re doing gifts and want them nicer, trimming can be worth it.
5) Duplex printing: expect a little drift
Even good home duplex units can shift the back side slightly.
Ways to make it look better:
- Keep text away from edges
- Avoid hairline borders that need perfect alignment
- Test duplex on the paper you’ll use (paper thickness affects feed)
6) Booklet printing (if you’re stapling)
If you’re making a stapled booklet, you want “booklet mode” or “booklet imposition,” where pages are arranged so they fold into the right order.
Common gotchas:
- Page count often needs to be a multiple of 4 for saddle stitch
- Thicker paper reduces the number of pages you can fold cleanly
- “Creep” happens (inner pages stick out more and may need trimming)
If you’ve handled real production files, this will sound familiar. Home printing just makes it more hands-on.
A fictional example (clearly fictional)
Fictional example: Sam is a designer in Austin, printing a 32-page zine for a local event. On the first try, Sam prints single pages and staples them, but the page order is chaotic. Second try: Sam uses booklet printing. The pages come out in the right order, fold cleanly, and the whole thing suddenly feels like a “real” zine instead of a stapled stack.
That’s formatting doing the heavy lifting.
Inkjet vs Laser for Book Printing (What Actually Changes)
If you’re comparing inkjet vs laser for book printing, here’s the practical difference:
- Inkjet = liquid ink sprayed onto paper
- Laser = toner powder fused with heat
Both can print books. They just behave differently.
Inkjet: great for photos, can be picky
Pros
- Often, better photo quality
- Smooth gradients and color blends
- Good for art books or image-heavy pages (within limits)
Cons
- Ink can smear if the paper isn’t right
- Heavy ink coverage can make pages curl
- Ink costs can jump fast with high-coverage pages
- Dry time matters (especially when stacking pages)
Inkjet is like making pancakes on a pan that needs the right heat. When it’s dialed in, it’s great. When it’s not, it gets messy.
Laser: sharp text, usually calmer for big text runs
Pros
- Crisp text (great for novels, manuals, textbooks)
- Faster for long print jobs
- Toner often costs less per page than ink (depends on model)
- Pages come out dry and stack nicely
Cons
- Some lasers struggle with thick cardstock
- Photos can look flatter or grainier
- Toner can crack along folds if it’s laid down heavily (important for booklets)
If your project is mostly text and you want fewer headaches, laser is often the easier route.
Settings that matter more than people think
If you’re trying to print a book using a normal printer, these settings can make or break your results:
- Print quality mode (Draft vs Normal vs Best)
Draft can look weak and uneven. The best can drink ink. Normal is often the sweet spot.
- Grayscale vs black-only
Some printers use color inks to make “richer black.” That can raise costs and change tone.
- Paper type
If you choose “Plain Paper” but feed glossy or heavier stock, you might get smears or bad fusing.
- Duplex type
Flip on long edge vs short edge matters a lot. One wrong click and every back page is upside down.
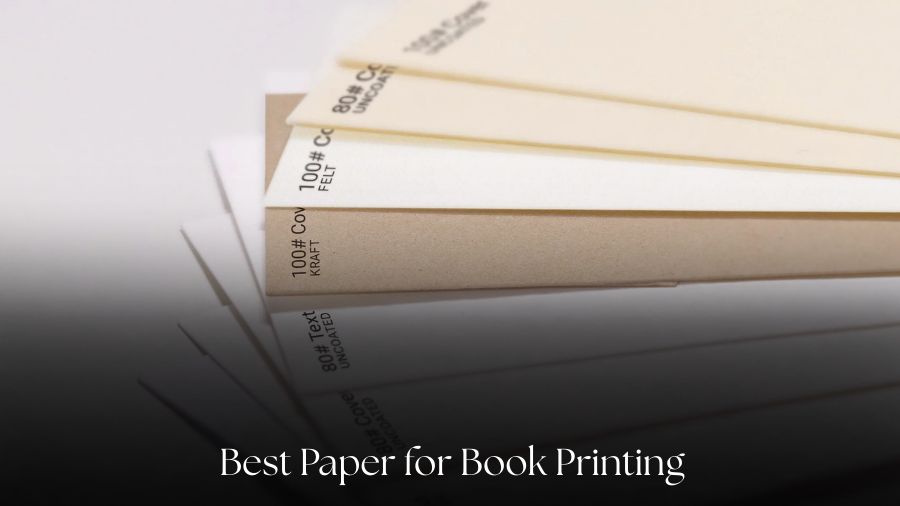
Best Paper for Book Printing (Inside Pages + Covers)
Paper is the fastest way to make a home-printed book feel better.
You don’t need fancy paper. You need the right paper.
For Interior Pages
Here are common choices in the USA if you’re searching for the best paper for book printing:
20 lb copy paper (≈ 75 GSM)
- Cheapest
- Easy to find (Walmart, Target, Staples, Office Depot)
- More see-through, especially with inkjet
- Feels “basic handout”
24 lb copy paper (≈ 90 GSM)
- A noticeable upgrade
- Less see-through
- Still feeds well in most printers
- Great for text-heavy books
28–32 lb paper (≈ 105–120 GSM)
- Feels more premium
- Can jam more in picky printers
- Takes up more space in the binding
If you only change one thing, try 24 lb. It’s the “small upgrade, big difference” option.
Brightness and Opacity
- Brightness: how white the paper looks
- Opacity: how much it blocks the see-through
If you’re printing double-sided and hate seeing shadows of the back page, pick thicker paper with better opacity.
Coated vs Uncoated
- Uncoated: normal paper feel, easy to read, great for text
- Coated (like glossy): better for photos, can smear with inkjet if not made for it
A lot of books you read are on uncoated paper for a reason: it’s comfortable and forgiving.
Grain Direction (a pro detail, explained like a human)
Paper fibers run mostly one way. That affects how paper folds.
If you’re folding booklets, paper that folds “with the grain” tends to crease cleaner. Home buyers usually can’t control this easily, but if you ever notice a fold cracking or fighting you, grain direction is one reason.
Cover Paper
For covers, you want thicker stock:
- Light cardstock or “cover stock”
- Try manual feed if your printer has it (less bending)
Print one cover test page before you print 20. Printers love to surprise you.
Where People Actually buy this Stuff
If you’re in the USA, the easy places are:
- Staples / Office Depot / FedEx Office (good variety)
- Amazon (lots of options, quality varies)
- Local print shops often have great paper advice and samples.
At Blue Mount Publisher, we’ve seen people waste money on fancy paper that their home printer hates. Start simple. Test one pack before you commit.
Cost to Print a Book at Home (A Real-world Way to Estimate)
Let’s talk about the cost to print a book at home without guessing.
The cost to print a book at home usually depends on:
- Paper
- Ink/toner
- Binding supplies
- Waste (tests + mistakes)
- Your time (not always in dollars, but it counts)
Step 1: Paper cost per book
Do a quick math for the paper costing. For example, a ream contains 500 sheets. The price varies due to its weight and brand.
Step 2: Ink or toner cost
Check the cartridge/toners and how many pages they can yield. They usually have a specific count. A rough estimate would be good before you consider the book in quantity.
Inkjet cartridges can run higher per page, especially for color.
Step 3: Binding cost
Binding depends on the method:
- Stapling: basically pennies, plus time
- Comb/coil: cost of spines + covers + maybe a binding machine
- Three-ring binder: higher cost per “book,” but reusable
A coil-bound workbook might add:
- $1–$4 per copy in supplies (rough range, depends on quality)
Step 4: Waste and test prints
Plan for waste. Seriously. Even pros run test sheets.
A safe planning number:
- Add 5–10% extra paper/ink for tests and “oops” pages
Three quick scenarios (rough but useful)
Here’s an imaginary scenario for your understanding
Scenario#1: 60-page black-and-white workbook, 3 copies
- Paper: low
- Toner: moderate
- Binding: moderate
- Home printing can be a win-win
Scenario#2: 250-page novel, 20 copies
- Paper: still manageable
- Toner/ink: starts climbing
- Time: huge
- Home printing gets annoying fast
Scenario#3: 120-page full-color photo book, 5 copies
- Ink: can get expensive fast
- Paper: needs to match inkjet or laser type
- Home printing might work, but costs can surprise you
The “break point” idea (plain talk)
Home printing is often cheaper for:
- Very small quantities
- Proofs and mockups
- Short books
Professional printing often wins when:
- You need many copies
- You want consistent quality
- You need trimming and binding that looks clean
That’s why people bounce between both depending on the project. Even experienced folks do.
Risks of Printing a Book at Home (and How to Avoid the Classics)
Now let’s talk about the risks of printing a book at home. These are some of the risks of printing a book at home; the list can go on.
Risk 1: Paper jams in the printer
This is obviously the most common and the most popular culprit behind the messy print. Why does this happen, you wonder? Well, there are a number of ways, such as the dust stuck in the printer, usage of cheap paper, or you’ve used thick paper, or maybe you’ve overfilled your printer’s tray.
How to fix this issue? Always use fresh paper, fan the stack, print in batches, and use manual feed for thick stock.
Risk 2: Duplex alignment shifts
Another common risk is that the home duplex printers are not perfect, as one may not have thought about printing a book when buying it.
How to fix this issue? Keep your page margins generous, avoid thin border boxes, and test your duplex before printing.
Risk 3: Smudging (inkjet) or flaking (laser on folds)
Wrong paper type or heavy coverage can risk smudging or flaking during printing.
How to fix this issue? Make sure you’ve matched paper to printer type, let ink dry, and always avoid heavy toner on fold lines.
Risk 4: “Why is my PDF cropped?”
Scaling settings or a wrong page size may risk the PDF print being cropped.
How to fix this issue? Print at “Actual size,” confirm page size matches the PDF.
Risk 5: Banding or streaks
Dirty heads (inkjet) or drum issues (laser) can create issues of banding or streaking.
How to fix this issue? Run cleaning cycles, clean rollers, and replace worn parts if needed.
Risk 6: Pages curl and won’t stack nicely
Heavy ink coverage + thin paper can curl the pages, and they don’t stack properly.
How to fix this issue? Well, use thicker paper, reduce coverage, and let pages rest a while before binding.
Risk 7: See-through makes it hard to read
If you’re using thin paper and strong ink/toner, then it gets hard to read the text on the paper.
How to fix the issue? Use 24 lb or higher paper quality. Always go for paper with better opacity.
Risk 8: Page order gets messed up
If you’re printing in chunks without a system, then the pages’ order gets messed up.
How to fix? Label stacks, keep a clean workspace, and do a flip check before binding the papers together.
Risk 9: Trimming looks uneven
Scissors, dull blades, or big stacks can make the trimming look bad or uneven.
How to fix the issue? Use a proper paper trimmer. Likewise, measure twice before trimming. Also, trimming the papers in small batches creates a clean look.
Risk 10: Your “black” isn’t consistent
Why it happens: ink levels change, settings differ, grayscale mixing
Fix: lock settings, print in one run, consider black-only mode if consistent text matters
Binding a Home-Printed Book (Simple Options that Work)
Printing is only half the job. Binding is where your book becomes a book.
Option 1: Stapled booklet (saddle stitch)
Best for:
- Short page counts
- Zines, programs, small guides
What you need:
- Long-arm stapler (nice) or careful manual stapling
- Folded pages (often printed in booklet mode)
Watch-outs:
- Page count usually works best in multiples of 4
- Thick paper reduces the maximum number of pages you can fold cleanly
Option 2: Comb or coil binding
Best for:
- Workbooks
- Cookbooks
- Manuals that need to lie flat
What you need:
- Binding spines
- Hole punch (manual or machine)
- Covers (optional but makes it feel nicer)
This is one of the easiest ways to make home printing look intentional.
Option 3: Three-ring binder
Best for:
- Internal manuals
- Training guides you’ll update
It’s not glamorous, but it’s practical. Sometimes, practical wins.
Option 4: DIY perfect binding (the “ambitious” one)
Best for:
- Projects where you want the paperback look
What you need:
- Strong adhesive (book-binding glue is better than random craft glue)
- Clamps
- Patience
DIY perfect binding can work, but it’s the easiest place to end up with pages falling out if the glue job isn’t solid.
At Blue Mount Publisher, we see people attempt this for fun projects and small runs. It can be satisfying. Just don’t plan your whole launch around it unless you’ve tested it.
Self-publishing Printing Options (When Home Printing isn’t the Best Fit)
If home printing starts feeling like a second job, it may be time to look at self-publishing printing options.
Here are some of the self-publishing printing options:
Option A: Local print shop
Great for:
- Short runs
- Fast turnarounds
- Humans who can check your file and catch issues
A good local shop can help with:
- Trimming
- Coil binding
- Heavier covers
- Better paper choices
Option B: Office print services (Staples, FedEx Office)
Great for:
- Workbooks, manuals, handouts
- Coil binding
- Quick jobs when you don’t want to buy supplies
Quality can vary by location, but it’s convenient.
Option C: Print-on-demand (POD)
Great for:
- Selling online without storing inventory
- One-off orders shipped to customers
Tradeoffs:
- Less control than a dedicated printer
- Unit cost can be higher than large bulk runs
- Proofing matters a lot
Option D: Short-run digital printing
Great for:
- 25–500 copies (roughly)
- Consistent quality
- Clean trimming and binding
Option E: Offset printing (bigger runs)
Great for:
- Large quantities
- Best unit cost at scale
- Very consistent results
Offset is usually overkill for tiny runs, but for bigger runs, it can be the best deal.
A simple decision guide (plain talk)
Choose home printing when:
- You need a few copies
- It’s mostly text
- You want quick proofs
- You’re okay with doing hands-on finishing
Choose professional options when:
- You need many copies
- You care about retail-level appearance
- You want consistent trimming and binding
- You want to stop babysitting a printer
And yes, this is the kind of decision people ask us about at Blue Mount Publisher. We’re fans of using the right tool for the job, even when that tool is just your home printer.
Frequently Asked Questions
1) Is it cheaper to print a book at home or professionally?
Home printing can be an economical option if you’re printing a short book with basic paper quality. The price often flips when page count or quantity climbs. Ink or toner is usually the big cost, not paper, and home supplies are pricey per page compared to production machines. Also, time sneaks up on you. Collating, fixing jams, reprinting mistakes, and binding can eat an evening fast. Professional printers also include trimming and binding, which looks cleaner. If you need “good enough” for a small batch, home can win. If you need consistent quality for lots of copies, a professional often wins.
2) What is the best paper for book printing?
For most home projects, 24 lb uncoated copy paper is a great pick for interior pages. It’s thicker than basic 20 lb paper, so you’ll usually get less see-through when printing double-sided, and the book feels less flimsy. If you’re printing photos, paper made for your printer type helps a lot, inkjet paper can reduce smears and make colors look better, while laser-friendly paper handles heat and toner bonding well. For covers, you’d need a thick paper or a light cardstock. However, not every home printer is able to handle the thick stock. Therefore, you’ll have to do a small test first before you print a complete book set.
3) Can I print a book from a PDF at home?
Yes, and it is always recommended to print from a PDF file format to keep the layout stable. PDFs are better capable of keeping the font, spacing, and page size than Word Docs. One thing to keep in mind is to select “Actual Size” in the settings rather than “Fit to Page,” as it can mess with the margins. Another important setting is to check the duplex setting to ensure that the pages are not upside down. Before printing the full run, it is always recommended to print a small test first, i.e., 5 to 10 pages.
4) How do I bind a book printed at home?
There are a number of ways to bind your printed book at home. Here are a few options to go with when binding:
- Stapled Booklets
Stapled booklets work really well if you have a short number of pages.
- Coil or Comb Binding
This type of binding is good for workbooks and manuals because the book lies flat when open for taking notes.
- DIY Perfect Binding (Glued Spine)
Gluing the spine of the book is possible and easy to update, but you’ll have to do a couple of tests and find the right glue to keep the pages from pulling out.
5) How many pages can a normal printer handle?
An average home printer can print hundreds of pages, yet the question remains how many pages it can print before it jams, overheats, or gives alignment issues. Most of the time, the home printers can perform well if smaller batches are catered, like 20-40 sheets at a time. You’d also need to let the printer rest in between the prints.
Likewise, duplex printing can increase the chances of providing messy results, so you’d need to do a small batch test first.
Another thing to keep in view is to check the printer’s tray capacity and the recommended monthly page volume. For books over 200 pages, you’ll have to keep a system that keeps the pages in order.